
I spent three hours last night staring at a line of villagers that wouldn’t pathfind, all because I followed a “pro” guide written for 1.14. It’s the same story every time: you search for how to build a villager trading hall, find a flashy video, and realize halfway through that the mechanics changed two updates ago. Most of the layouts you see online are completely broken on the current version, leaving you with stuck entities and zero emeralds. I got tired of wasting my time on outdated schematics, so I decided to stop reading other people’s outdated notes and just build one from scratch.
I’ve spent the last week stress-testing every single mechanic in this current build to ensure nothing breaks when you actually try to use it. This isn’t a lecture on aesthetics or some fancy build you’ll never finish; this is a no-nonsense blueprint for a functional, lag-reduced setup. I’m going to show you exactly how I laid out my current hall to maximize trade speed and prevent the common pathfinding glitches that ruin most designs. If you want a system that actually works without the bloat, this is it.
Table of Contents
Guide Overview
Tools & Supplies
- Minecart and Rails for transporting villagers
- Boats for moving villagers manually
- Name Tag to prevent villager despawning
- Lecterns (approx. 10-20) for Librarian trades
- Workstations (various quantities) for different professions
- Building Blocks (64+ stacks) for walls and stalls
- Trapdoors and Fences for containment and safety
Step-by-Step Instructions
- 1. First, you need to clear a flat area, ideally near a village or a swamp biome if you want easy access to certain professions, but honestly, just find a spot where the chunk loading won’t be an issue when you’re running around. I cleared a 30×30 area in my current survival world just to make sure I had enough room to move without hitting walls or getting stuck in a corner.
- 2. Lay down a solid foundation using something like stone bricks or deepslate; I don’t care what it looks like, but it needs to be non-flammable because one lightning strike shouldn’t wipe out your entire economy. I built mine on a raised platform to prevent any accidental creeper holes from ruining the floor layout.
- 3. Build the individual stalls using a 1×1 footprint for each villager, and make sure you leave a two-block gap between the stalls so they don’t accidentally pathfind into each other and cause a massive lag spike or a routing error. I use a simple row design because it’s the most efficient way to manage them without having to run a maze every time I want to trade.
- 4. Place the workstations—the lecterns, fletching tables, or whatever you’re using—directly in front of each 1×1 cell. It is crucial that the workstation is placed in a way that the villager can actually “touch” it to claim it, otherwise, you’ll just be staring at a jobless villager for twenty minutes.
- 5. Trap the villagers using boats or minecarts to move them into their designated spots. I’ve found that using boats is way less chaotic for the server’s entity processing than trying to shove a dozen minecarts down a single rail line, though it takes a bit more patience to steer them into the stalls.
- 6. Once they are in place, place a slab or a trapdoor at head height in front of the villager. This prevents them from jumping out or looking at you in a way that breaks the AI, and it keeps them perfectly stationary while you’re doing your trades.
- 7. Finally, light up the entire interior and the immediate perimeter with torches or lanterns. I don’t deal with mob spawns inside my builds, so I over-light everything to make sure nothing spawns in the dark corners of the hall and breaks a villager’s nose or something equally annoying.
Mastering Minecraft Villager Breeding Mechanics Without Wasting Resources
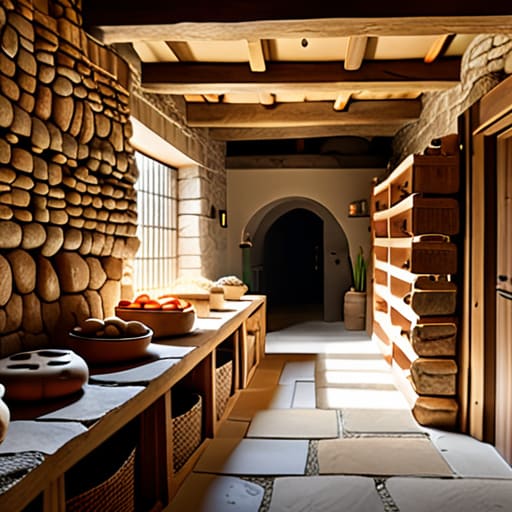
The biggest mistake I see people make is trying to breed villagers in the middle of their main hall. It’s a mess. If you don’t isolate the breeding area, you end up with way too many entities pathfinding into your workstations, which breaks everything. I keep my breeding setup in a separate, enclosed chunk to keep the pathfinding predictable. You don’t need a complex automatic villager breeder design with redstone clocks that’s going to break the moment you update the world; you just need a simple, dedicated room with enough beds and a consistent food supply.
I’ve learned the hard way that throwing stacks of bread at them is a waste of time. I use carrots because they’re easier to farm in bulk without a massive setup. Once you have a steady flow of babies, don’t just shove them into the hall. Move them to a temporary holding cell first. This lets you control the timing of when they enter your main trading loop, ensuring you don’t accidentally mess up your efficient emerald trading setup by introducing a villager with bad trades too early.
Optimizing Your Efficient Emerald Trading Setup for Maximum Output

Once you have the basic stalls running, the real bottleneck is how you manage the workflow. I’ve found that most people mess up the spacing, which leads to villagers getting stuck or workstations failing to claim. To maintain an efficient emerald trading setup, you need to ensure there is a clear line of sight between the villager and their specific workstation, but nothing else. If you crowd them too close, the pathfinding breaks and you’ll spend more time fixing broken trades than actually trading. I usually leave a two-block gap between the workstation and the villager to prevent any weird entity collisions.
The other thing you need to consider is the long-term economy. If you aren’t planning on doing the zombie villager curing process, your trade prices are going to stay high, which makes emerald farming a massive grind. I personally cured a stack of librarians last week to bring everything down to a single emerald per trade. It takes more effort upfront, but once you have those discounted prices locked in, the output is significantly higher. Don’t bother with complex automated systems until you’ve mastered this manual layout first; otherwise, you’re just building a headache.
5 Things That Actually Break Your Hall (And How I Fixed Them)
- Stop using glass for the walls if you’re building near a village. I learned the hard way that pathfinding glitches through certain blocks, and suddenly a zombie is inside your trading floor because a stray mob clipped through a corner. Stick to solid blocks.
- Don’t forget the lighting under the workstations. I’ve seen plenty of “efficient” designs that fail because a single dark spot spawns a skeleton right next to your librarians, and once they start hitting the villagers, the whole trade cycle breaks.
- Check your villager spacing. If you cram them too close together, they’ll constantly try to pathfind toward each other, which causes massive server lag and can even break the workstation link. I leave at least two blocks of air between their individual stalls.
- Keep the beds out of the actual trading cells. I tried putting beds inside the stalls to keep them “happy,” but it just messed up the breeding logic and made it impossible to control which villager claimed which bed. Keep the breeding area separate from the trading floor.
- Test your workstation breaks manually. Don’t just assume a lectern will work; I always break it and replace it once per villager to force the profession lock. If you don’t do this, you’ll end up with a hall full of useless farmers when you actually wanted mending books.
The Bottom Line
Stop using outdated 1.14 designs; the way villagers pathfind and claim beds in 1.21 means half the “classic” layouts just end up breaking your villager AI.
Don’t bother with massive, sprawling breeder setups if you don’t have the exact workstation-to-bed ratio right, or you’ll just end up with a massive lag spike and zero actual villagers.
If you aren’t manually checking the trade locks on every single villager after a breeding cycle, you’re going to waste hours trying to trade with a librarian who refuses to work.
Final Thoughts on the Build

Building this hall isn’t just about placing workstations and hoping for the best; it’s about the specific way you manage the entity density and the pathfinding logic. I spent way too much time troubleshooting why my villagers weren’t picking up their trades, but once I locked in the layout I described here, everything stabilized. You need to keep your breeding area strictly separated from the trading floor to avoid unintended villager movement that breaks the whole system. If you follow the exact steps I used for my 1.21 setup—focusing on the specific spacing for the workstations and the emerald conversion loop—you won’t have to deal with the lag or the broken trades that most of these outdated guides ignore.
At the end of the day, a trading hall is a tool, not a monument. I don’t care how aesthetic it looks if the trade refresh rates are garbage or if it’s tanking my server’s TPS. Once you have this infrastructure running, you stop playing the survival grind and start playing the resource management game. It takes a few hours of tedious setup and a lot of trial and error to get the mechanics perfect, but once it’s done, you’re essentially playing with infinite resources. Stop following the generic tutorials and just build it right the first time so you can actually get back to playing the game.
Frequently Asked Questions
Will the villagers lose their professions if I move them to the hall after they've already been traded with?
No, they won’t. Once you trade with a villager even once, their profession and their specific trades are locked in. I’ve moved dozens of librarians across my setups in 1.21, and as long as they have access to their workstation during the initial trade, they’re permanent. Just make sure you don’t accidentally break their workstation while moving them, or you’ll end up with a jobless villager and a lot of wasted time.
How do I stop the villagers from pathfinding out of their stalls and breaking the entire setup?
The issue is usually the pathfinding logic trying to reach a workstation that isn’t directly in front of them. I’ve seen people use fences, but villagers can glitch through them if they’re trying to pathfind to a bed or workstation. The only way I’ve found that actually holds up in 1.21 is using trapdoors over the head of the villager or a single slab at their feet. It breaks their line of sight and pathing nodes.
Is it better to use beds inside the individual trading stalls or just keep one big bed farm nearby?
Don’t put beds in the individual stalls. I’ve tested this on 1.21, and it’s a recipe for pathfinding nightmares and broken villager AI. If you try to cram beds into every single stall, the villagers will constantly try to pathfind to them, causing lag and potentially breaking your trading mechanics. Just keep a centralized bed farm in a separate, walled-off area nearby. It keeps the trading zone clean and the villagers focused on their trades.
