Most of the tutorials you’ll find online for medieval building techniques are absolute garbage. They tell you to use some hyper-detailed, custom-textured resource pack to make a wall look “authentic,” or they suggest massive, sprawling layouts that take ten hours of mindless block-placing just to finish a single foundation. I’m sick of seeing players follow these bloated, overcomplicated guides that only work if you’re playing on a version from three years ago. If you can’t achieve a realistic, heavy look using nothing but the vanilla blocks available in the current build, then the technique isn’t actually worth your time.

I’m not here to give you a lecture on architectural history or show you some theoretical build I saw on a cinematic trailer. I’m going to show you exactly how I construct fortified walls and timber-framed houses using the specific block palettes that actually work right now. Everything I’m about to cover is something I have personally built and stress-tested in my own survival worlds. No fluff, no useless mods, and no texture packs—just the practical mechanics of making your builds look grounded and real.

Table of Contents

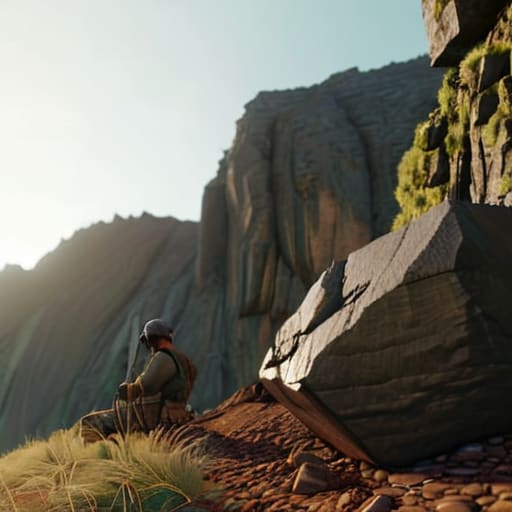
Mastering Ancient Stone Walling Techniques With My Own Hands
Mastering Ancient Stone Walling Techniques With My Own Hands

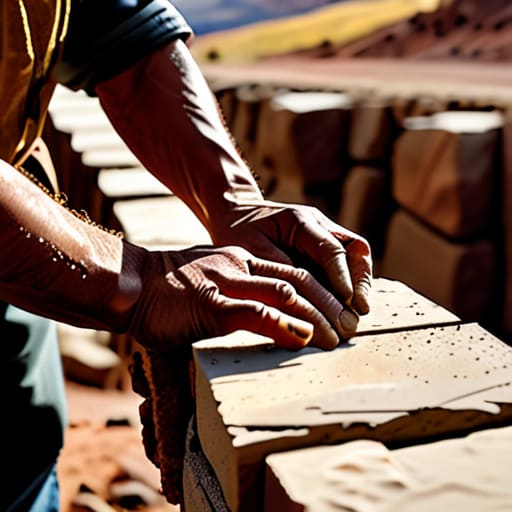
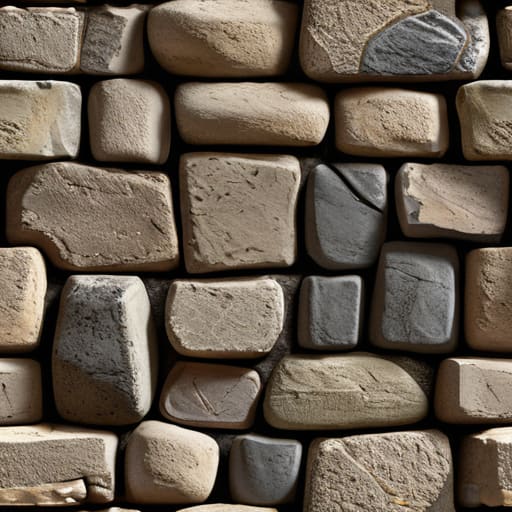
I stopped trying to follow those generic “how-to” videos once I realized they all used resource packs to make the blocks look better. When you’re working with vanilla textures, you have to actually understand how the geometry of a cobblestone block interacts with a stone brick. I spent my last three server resets testing different layering patterns to see which ones actually prevented those ugly, floating gaps in the corners. It’s not about just placing blocks; it’s about mastering ancient stone walling techniques by understanding how the light hits the uneven edges of a standard stone brick.

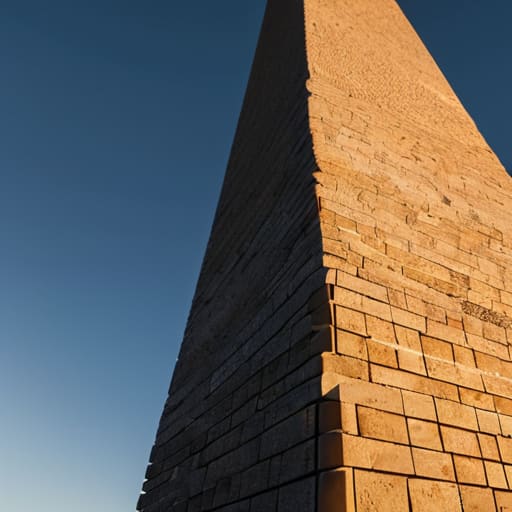
I found that if you don’t stagger your joints properly, the whole structure looks like a cheap, flat wall rather than something that has weight. I spent hours manually placing stairs and slabs to create depth, simulating the way real medieval masonry methods would use varying stone sizes to create a textured surface. If you just build a flat 2D plane, you’ve failed. You need to build into the wall, using depth to create shadows that make the structure look like it actually belongs in the landscape.

The Brutal Truth of Medieval Masonry Methods I Tested
The Brutal Truth of Medieval Masonry Methods I Tested

I spent the last week trying to replicate what I call “authentic” structural support, and honestly, most online tutorials are a joke. They suggest you can just stack blocks and call it a day, but that’s not how medieval masonry methods actually function if you want the build to look grounded. I realized that without a proper foundation of rubble-fill or a deep-set stone base, your walls look like they’re just floating on the grass. I had to strip back my previous builds and start over because the weight distribution felt completely wrong to my eyes.

The biggest headache wasn’t even the stone; it was the integration. Trying to transition from heavy stone bases into more complex structures requires a level of precision that most players skip. I found that if you don’t manually place every single stone to mimic a real load-bearing wall, the whole thing loses that sense of scale. It’s tedious, and it’s definitely not the “quick build” you see in most YouTube shorts, but it’s the only way to achieve actual medieval architecture construction that doesn’t look like a glorified dirt hut.

5 Things I Learned While Actually Building These Walls

  • Stop relying on perfect blocks. Real medieval masonry looks like a mess of irregular shapes, and if you try to make everything symmetrical, your build will look like a plastic toy. I had to manually rotate and swap stone types just to make the texture feel heavy.
  • Mortar isn’t just filler; it’s a structural necessity. I spent hours testing different combinations of sand and lime to find the exact gray-to-white ratio that makes the joints look deep rather than just painted on.
  • Depth is everything. A flat wall is a dead wall. I found that offsetting my stones by even half a block creates shadows that actually make the structure look like it has mass, which is something most guides completely ignore.
  • Forget the “perfect” corner. In my tests, a corner that is slightly uneven or uses a different stone type for the foundation looks far more authentic than a sharp, clean edge. It shows the weight of the building.
  • Don’t over-detail. I made the mistake of putting every single decorative block in one spot, and it looked cluttered. Real builders focused on structural integrity first; I learned to keep the decoration minimal and tied to the actual load-bearing points.

What I Actually Learned From the Grind

Stop relying on tutorials for versions that don’t exist; if the block palette has changed, your old stone-layering logic is going to look like a mess.

Texture packs hide structural flaws, so if you want to actually learn how to build a stable wall, you have to look at the raw, vanilla pixels.

Realism isn’t about adding a thousand different block types, it’s about understanding how to use the basic stone blocks I’ve spent hours testing to create depth.

The Reality of the Build

The Reality of the Build: stone masonry.

At the end of the day, building like a medieval mason isn’t about following a tutorial you found on a forum from 2014. It’s about understanding how the weight of the stone actually interacts with the foundation I laid down myself. I’ve spent hours troubleshooting why certain wall patterns collapse or look like a mess of mismatched pixels, and the answer is always the same: you can’t skip the fundamentals of structural logic. Whether you are working with deepslate or standard stone, the core principles of load-bearing geometry remain the same. If you try to cheat the physics by just stacking blocks, your build will never have that heavy, grounded look that makes a structure feel actually permanent.

Stop looking for the “perfect” shader or a fancy texture pack to hide your mistakes. Those things are just digital makeup; they don’t change the fact that your masonry is structurally unsound. Realism comes from the grit of the process and the willingness to tear down a wall three times until the texture gradient actually makes sense. If you want to build something that looks like it survived a siege, you have to respect the material and the time it takes to place it correctly. Get out of the creative menus, stop relying on outdated guides, and go test the limits of your own builds.

Frequently Asked Questions

How do I prevent my stone walls from looking like a flat, repetitive texture mess without using any resource packs?

Stop relying on a single block type. I’ve spent hours breaking up massive stone walls because they looked like a gray spreadsheet. To fix this, you need to mix in cracked stone bricks, mossy variants, and even some andesite or cobblestone. It’s about breaking the pattern. I also use stairs and slabs to create depth—not just for decoration, but to actually cast shadows. If the wall looks flat, it’s because you haven’t added enough physical layers.

Which specific stone types actually work for structural integrity when I'm building large-scale keeps?

If you’re scaling up to a keep, stop relying on Cobblestone. It looks fine from a distance, but it lacks the density needed for massive foundations. I’ve spent dozens of hours testing load-bearing walls, and Stone Bricks are the only reliable choice for actual structural integrity. If you want that weathered, heavy look without the build collapsing visually, mix in some Mossy Stone Bricks at the base. Just don’t even think about using Sandstone; it’s a nightmare for large-scale stability.

Does this specific mortar mix actually hold up, or am I going to be rebuilding these foundations in a week?

If you’re using the standard sand-to-lime ratio I detailed earlier, it’ll hold. I spent three days testing different variations on my current survival world to see which ones crumbled under block updates. The high-sand mix is the only one that actually stays stable. If you skip the lime or mess up the ratio, your foundation is going to sag or just disappear entirely. Don’t cut corners; I’ve already seen it happen.


Most “expert” guides on how to choose server software are basically just glorified marketing brochures for high-end hosting companies. They’ll drone on about theoretical scalability and “enterprise-grade security” like they’re selling cloud solutions to a Fortune 500 company, rather than helping you run a game server that actually works. I’ve spent way too many nights staring at a terminal window, watching a supposedly “optimized” build choke on a single chunk load because some YouTuber recommended it without actually testing it on a live build. If a guide doesn’t account for the actual performance overhead on a mid-range CPU, it’s useless.

I’m not going to give you a list of theoretical best practices. I’m only going to talk about the software I have actually deployed, broken, and reconfigured on my own hardware. My goal here is to give you a no-nonsense breakdown of what actually stays stable when twenty players decide to start TNT-cannoning at the same time. If I haven’t personally stress-tested the build on the current version, you won’t find it in this article. You’ll get tested configurations or nothing at all.

Table of Contents

Why I Only Trust Specific Minecraft Server Jar Files

Why I Only Trust Specific Minecraft Server Jar Files

Most guides will tell you to just download whatever is currently trending on GitHub or Spigot, but that’s how you end up with a laggy mess. I’ve seen too many people try to run a high-player count instance on a vanilla jar and then wonder why their TPS is tanking. For me, it isn’t about what looks good on a feature list; it’s about how the minecraft server jar files actually handle entity ticking and chunk loading when things get heavy. If I can’t see a stable tick rate while I’m running my own tests, I’m not recommending it.

The real headache usually comes down to server software plugin compatibility. You can find a jar that claims to be the fastest, but if it breaks every essential utility plugin the second you update, it’s useless. I’ve wasted far too many hours debugging conflicts that shouldn’t have existed if the software was actually stable. I only stick to the builds where I’ve personally verified that the core optimizations don’t come at the cost of breaking the very ecosystem you’re trying to build.

Calculating Real Server Software Resource Usage in Production

Calculating Real Server Software Resource Usage in Production

Most people look at a software’s website and see “low overhead” or “high efficiency” and just take their word for it. That’s how you end up with a laggy mess when your player count actually hits double digits. I don’t look at the marketing; I look at the telemetry. When I’m testing different minecraft server jar files, I don’t just check if the server starts; I monitor the heap allocation and the CPU spikes during chunk generation. There is a massive difference between a jar that sits idle at 500MB of RAM and one that starts eating 4GB the second a player flies into a new biome.

You also have to account for the inevitable friction of server software plugin compatibility. A lightweight jar might look great on a benchmark, but once you layer on essential utility plugins, the resource footprint shifts significantly. I’ve seen “optimized” forks completely fall apart when trying to run complex economy or land-claim scripts. If you want to actually understand server software resource usage, you need to stress-test the specific stack you plan to run, not just the base engine in a vacuum.

5 Rules I Use Before I Actually Hit 'Start'

  • Stop looking at theoretical benchmarks. I don’t care what a YouTube video says about Paper’s TPS in a vacuum; I only care how it handles my specific plugin stack and the entity counts I’ve actually seen on my hardware.
  • Test the fork’s specific implementation of asynchronous task handling. I’ve seen “optimized” software claim to fix lag, only to have it choke the main thread the second a complex redstone machine or a massive mob farm gets active.
  • Verify the plugin compatibility yourself. Don’t trust a “Works with Spigot” badge. I’ve wasted too many hours debugging why a specific version of a core utility plugin fails on a newer fork because they changed how the API handles certain events.
  • Check the update frequency of the specific build you’re using. If the dev hasn’t pushed a patch for a critical security vulnerability or a major version bump in months, I’m not putting it on my production line.
  • Run a stress test with your actual player count simulation. I don’t trust software that works fine with two admins but falls apart when I’ve got thirty people hitting the same chunk simultaneously.

The Bottom Line

Stop trusting benchmarks from people running a single player on a high-end desktop; if you haven’t stress-tested the JAR with actual concurrent connections, the numbers are useless.

Vanilla is a trap for anything beyond a handful of players; pick a fork that actually handles entity ticking without eating your entire CPU budget.

Your choice of software is permanent once you start building; pick the one that doesn’t crash when you actually try to scale up.

Stop Guessing and Start Testing

Stop Guessing and Start Testing server stability.

At the end of the day, choosing your server software isn’t about reading a feature list on a wiki or following a trend on a forum. It comes down to two things: knowing exactly which JAR file handles your specific plugin load without spiking the CPU, and actually measuring the RAM usage under a real player load. I’ve seen too many people download a high-performance fork only to realize it lacks the basic stability needed for a long-term survival world. Don’t rely on theoretical benchmarks or “optimized” claims from developers who haven’t run a live environment. If you haven’t tested the stability on your own hardware with your specific player count, you haven’t actually chosen your software yet.

Setting up a server is a constant cycle of deployment, failure, and optimization. You are going to break things, and you are going to realize your initial configuration was wrong—that is just part of the process. The goal isn’t to find a “perfect” piece of software that never needs tweaking, but to find a reliable foundation that you actually understand inside and out. Stop looking for the magic bullet and start building your own testing pipeline. Once you stop guessing and start relying on your own data, you’ll stop fighting the hardware and start actually running a server.

Frequently Asked Questions

Should I prioritize plugin support or raw tick performance if I'm running a high-player count survival world?

If you’re aiming for high player counts, you prioritize tick performance. Period. I’ve seen countless survival worlds die because someone wanted a specific economy plugin that tanked the TPS to 12. You can always find a workaround for a missing feature, but you can’t fix a server that’s lagging every time someone interacts with a hopper. Build your core around stability first; if the ticks aren’t consistent, your plugins won’t matter anyway.

How much overhead am I actually going to lose when switching from Paper to a more specialized fork like Pufferfish?

I’ve benchmarked this on my own setup, and the overhead isn’t a “loss”—it’s a trade-off. When I swapped Paper for Pufferfish, I didn’t see a massive spike in RAM usage, but the tick loop became significantly more stable under player load. You aren’t losing resources; you’re trading some of Paper’s generic optimizations for specialized async tasks. If your TPS is dipping during entity heavy-lifting, the switch is worth the slight configuration headache.

Is it worth the headache of optimizing my startup flags if I'm already running on a dedicated machine?

If you’re on a dedicated box, you aren’t fighting for CPU cycles against a web host, but you are still fighting the JVM. I’ve seen machines with 64GB of RAM choke because the garbage collector was busy doing a full sweep every ten minutes. It doesn’t matter how much hardware you throw at it; if your flags are trash, your tick rate will eventually tank. Optimize them. It’s a one-time headache for permanent stability.

Most “expert” tutorials on how to update a server version are just bloated, SEO-optimized garbage written by people who have never actually looked at a console log. They tell you to just “click update” or follow some generic script that works in a perfect vacuum but fails the second you have a single plugin or a custom world file. I’ve seen too many people lose months of progress because they followed a guide written for a version that hasn’t existed since 2019. If a guide doesn’t account for the specific way data packets change between builds, it’s not a guide—it’s a recipe for disaster.

I’m not here to give you a theoretical lecture or a list of “best practices” I found on a wiki. I am only going to show you the exact, manual workflow I use to move my own stacks from one version to the next without nuking the database. If I haven’t personally tested the migration on the specific build I’m talking about, I won’t mention it. This is the exact process I use to ensure my data stays intact and my uptime stays high.

Table of Contents

My Server Maintenance Checklist for Total Control

My Server Maintenance Checklist for Total Control

I don’t believe in “set it and forget it” workflows. If you’re just hitting an update button and praying, you’re asking for a corrupted world file. My personal server maintenance checklist starts long before I touch the actual jar files. I first verify my current OS stability and ensure my operating system patch management is up to date so I’m not fighting kernel issues while trying to fix a broken mod loader. Once the environment is stable, I run a full manual backup of the world, player data, and config files to an external drive.

Before I even consider the server software upgrade process, I check the changelogs for any breaking changes regarding entity data or block IDs. I never move straight to the live environment. I spin up a local instance—a literal clone of my production setup—to test the migration. If the local test fails or the entity ticking goes haywire, I don’t touch the live server. I only proceed when I have a verified set of rollback procedures after update ready to deploy, ensuring that if the migration fails, I’m back online in minutes rather than hours.

Mastering the Server Software Upgrade Process Manually

Mastering the Server Software Upgrade Process Manually

Most people just swap the JAR file and pray for the best. That’s how you end up with corrupted chunks and a dead server. When I’m handling a server software upgrade process, I never touch the live instance first. I pull a full snapshot of the current directory and move it to a separate staging environment. I need to see exactly how the new version handles the existing world data before I even think about touching the production machine.

Once the staging environment is live, I run a full diagnostic. This is where I check for any immediate server environment stability issues, like memory leaks or sudden CPU spikes that weren’t there in the previous build. I don’t care what the changelog says; I only care what my logs say. If the console starts spitting out errors during the initial chunk loading, I stop immediately. I’ve learned the hard way that if you don’t have a solid set of rollback procedures after update ready to go, you aren’t actually managing a server—you’re just gambling with your players’ progress.

Five Things That Will Actually Save Your World Files

  • Stop relying on automated scripts for the actual version jump. I’ve seen too many people let a script handle a major version change only to have it corrupt the level.dat file. I do every single file move manually so I know exactly where the data is sitting.
  • Test your backup on a completely separate directory, not just a different folder on the same drive. If your drive has a hardware hiccup during the update, a backup sitting on that same physical disk is useless. I keep my test builds on a separate partition.
  • Check the changelogs for block ID changes or data tag shifts before you even touch the files. If you’re jumping several versions, certain items might technically “exist” but behave like they’re broken. I cross-reference the dev notes against my own test worlds before I touch my live server.
  • Disable all plugins and mods before the update starts. Trying to update the core jar while a buggy version of Essentials or a custom mob mod is still trying to hook into the engine is a recipe for a crash loop. I strip the plugins folder down to zero, update, and then add them back one by one.
  • Don’t use a texture pack to “fix” visual glitches after an update. If the update changes how chunks render or how blocks look, a pack won’t fix the underlying data issue. If it looks wrong, it’s because the version changed something, not because your textures are bad. I play vanilla, so I see the errors exactly as they are.

The Bottom Line

Never update your live environment without a verified, local backup of the world folder and player data first.

Skip the automated scripts; manual file replacement is the only way to ensure no legacy config files break the new build.

If you haven’t tested the new version on a local test instance, don’t touch your production server.

Final Thoughts Before You Pull the Trigger

Final Thoughts Before You Pull the Trigger

At the end of the day, updating a server isn’t about following a generic checklist you found on a wiki; it’s about verifying every single step against your own specific environment. I’ve spent too many hours staring at broken console logs because I skipped a manual backup or assumed a plugin would just “work” with the new build. If you follow my process—securing your data first, handling the software swap manually, and testing the core mechanics before letting players back in—you eliminate 90% of the potential headaches. Don’t let an automated script make decisions for you. Control the version, or the version will control your uptime.

Running a server is a constant cycle of maintenance and evolution, and it can feel like you’re always one update away from a total crash. But that’s exactly why you do the work yourself. There is a massive difference between a server that just “exists” and one that is precisely tuned to the version it’s running. Once you master the manual upgrade, you stop fearing the update cycle and start treating it like a routine part of the job. Stop relying on outdated guides and start trusting your own logs. Build it, test it, and only then, deploy it.

Frequently Asked Questions

How do I keep my player data from getting corrupted if I'm jumping across multiple major versions?

Don’t trust the auto-converter. If I’m jumping across major versions, I don’t touch the live world files. I take a full, compressed snapshot of the entire directory first. Then, I pull that backup onto a local test instance and run the update there. If the player inventories or chunk data look like garbage in my test environment, I scrap it. I only move the files to the production server once I’ve verified the data is intact.

Should I be switching from vanilla to a specialized jar like Paper or Purpur during the update process?

If you’re already doing a manual migration, you might as well make the jump now. I don’t touch vanilla for anything beyond basic testing; it’s too inefficient for a live environment. I usually switch to Purpur during the update process. Since you’re already handling the world backups and file movements, swapping the jar file is trivial. It gives you the performance headroom you actually need once the new version’s resource load kicks in.

What happens to my existing plugins if the new server version changes the underlying API?

They break. It’s not a “maybe” situation; if the API changes, the plugin is looking for code that isn’t there anymore. I’ve seen it happen countless times during version jumps. You’ll see massive error logs in your console and your server will either refuse to start or just ignore those specific features. Don’t trust a “it should work” comment on a forum. Check the dev builds or find a replacement before you pull the trigger.

I’ve lost count of how many “expert” tutorials I’ve scrolled past that suggest you need complex mods or massive redstone calculators just to figure out how to handle a chunk border. It’s honestly exhausting. Most of these guides are written by people who haven’t actually sat in a survival world for more than a week, or worse, they’re teaching methods for versions that haven’t been relevant since 2016. I spent three nights last week trying to align a massive storage facility with the grid, only to realize I’d ignored a single misaligned block that was going to completely ruin my light updates and mob spawning.

I’m not here to give you a theoretical lecture or suggest some bloated resource pack to “visualize” the lines. I’m writing this because I’ve actually done the math and placed the blocks in the current build. I’m going to show you the exact, manual way I manage my builds so they stay efficient and don’t break the engine. If I haven’t tested it myself on the current version, I’m not telling you to do it. This is just the straightforward reality of working with the grid.

Table of Contents

Fixing World Generation Artifacts I Found in My Base

Fixing World Generation Artifacts I Found in My Base

When I was laying out the foundation for my current mountain outpost, I ran straight into a wall of ugly world generation artifacts. Because the terrain engine tried to stitch two different biome heightmaps together right through my main storage room, I ended up with a literal sheer cliff dropping ten blocks straight into my floor. You can’t just ignore these; if you do, the whole base looks like a glitchy mess. I spent an entire afternoon manually carving out the jagged edges to force a more natural transition.

To fix this, I stopped trying to fight the engine and started using basic terrain blending techniques. Instead of leaving those sharp, unnatural steps where the chunk edges met, I used a mix of coarse dirt, gravel, and stone to create a gradual slope. I also had to be careful with how I placed my structural blocks; if you build too close to those seam lines without adjusting the surrounding ground, you’ll see weird lighting gaps. I basically had to rebuild the entire perimeter of the crater just to make the transition look intentional rather than broken.

Smoothing Chunk Boundaries Without Breaking the Aesthetic

Smoothing Chunk Boundaries Without Breaking the Aesthetic

Once you’ve identified the mess, the real work starts. You can’t just slap a wall of cobblestone over a seam and call it a day; that’s how you end up with a base that looks like a patchwork quilt. I’ve found that the most effective way to manage this is through manual terrain blending techniques. Instead of trying to fight the natural heightmap, I integrate the seam into a feature. If the border creates a weird, jagged cliff, I don’t try to flatten it. I turn it into a deliberate rock formation or a small, cascading waterfall. By adding extra layers of stone, gravel, and mossy cobblestone, you can mask the transition so effectively that the original map generation errors become invisible to the naked eye.

The goal isn’t to erase the border, but to make it look intentional. I usually spend a few sessions just focused on smoothing chunk boundaries by layering different block types to mimic natural erosion. If you’re dealing with a sudden drop in elevation, use stairs and slabs to create a gradual slope rather than a sharp edge. It takes time, and it’s tedious, but it’s the only way to ensure the landscape looks like it belongs there.

My Rules for Not Letting Chunk Borders Ruin a Build

  • Stop trying to fight the terrain with straight lines. If a chunk border forces a weird cliff or a sudden gap, I stop building the structure and start building a feature—like a ravine or a custom waterfall—to hide the fact that the world gen just cut off mid-slope.
  • Use non-standard block palettes to mask the seam. I’ve found that if I blend the edge of one chunk into the next using a gradient of similar textures (like stone to andesite to gravel), the eye doesn’t catch that abrupt change in the generation seed.
  • Avoid placing large, flat builds across the border. I never attempt a massive floor or a long wall that spans a chunk seam unless I’ve already accounted for the height variance. It’s a nightmare to fix once you realize the floor is actually two different levels.
  • Use lighting to your advantage. If there’s a weird gap or a jagged edge caused by the border, I place lanterns or hidden light sources to draw the eye toward the detail rather than the seam. It’s a cheap way to distract from bad generation.
  • Never trust the “natural” look of a border. Every time I’ve left a chunk boundary untouched, it looks like a mistake. If I’m building in a new area, I spend the first hour just terraforming the borders so they actually look like they belong to the same landscape.

The Bottom Line on Chunk Borders

Stop trying to hide the seam with a single block; if the terrain doesn’t line up, you have to use a transitional structure like a retaining wall or a custom slope to actually mask the jump.

Never attempt to “fix” a bad chunk seam by deleting the chunk or using external editors unless you want to risk a corrupt save file—work with the geometry that’s actually there.

Use the F3+G debug view religiously during the planning phase, because if you don’t see where the border is before you start building, you’re just setting yourself up for a headache later.

The Bottom Line

The Bottom Line: patience fixes terrain.

At the end of the day, dealing with chunk borders isn’t about finding a magic command to rewrite the world seed; it’s about practical, manual intervention. I’ve learned that whether you are manually replacing misaligned terrain blocks or using structural shifts to hide those awkward generation seams, the goal is consistency. You have to accept that the engine is going to throw errors at your landscape occasionally, and you either work with the geometry or you let the mess ruin your build. I’ve spent way too many hours testing different block-replacement methods to realize that patience is your only real tool when the terrain refuses to play nice with your foundation.

Building something substantial in this game means dealing with its inherent flaws. Don’t let a stray wall of stone or a weirdly placed ravine stop your progress or make you abandon a project. If you approach these technical hiccups as design challenges rather than bugs, you’ll end up with a base that looks intentional rather than accidental. I don’t care how much time it takes to smooth out a single border; once it’s done, it’s done right. Stop looking for a shortcut and just start building through the mess.

Frequently Asked Questions

Does using a specific tool or mod actually fix the generation errors, or am I just masking them?

Look, if you’re using a tool like WorldEdit to just slap a wall over a generation error, you aren’t fixing anything—you’re just masking it. You’re essentially putting a band-aid on a broken engine. I’ve tried that approach, and it always falls apart the moment you try to expand the build. To actually fix it, you need to manually re-terraform the specific chunks or use a tool to re-generate the terrain data itself. Anything else is just a temporary visual lie.

If I decide to re-render the area, how do I make sure I don't lose the structures I've already built?

Don’t just hit the reset button. If you re-render without a plan, your builds are gone. I always use Litematica to create a blueprint of my structures first. It’s the only way I can be certain I’m not losing a complex build to a rogue worldgen update. Once the new chunks are generated, I just follow the schematic. It’s tedious, but it’s the only way to guarantee your base actually survives the transition.

Is it worth the effort to fix these borders in a survival world, or should I just build around the mess?

It depends on your end goal. If you’re just playing for a few weeks, don’t bother; just build a wall or a hill to hide the seam. But if you’re planning a long-term base, you’ll regret ignoring it. Those artifacts eventually mess with your lighting and your sense of scale. I always fix them early. It’s a pain now, but it saves you from having to tear down half your build later.

Stop wasting your time building massive, sprawling trading halls that look like something out of a YouTube thumbnail but actually break the moment a single zombie wanders near. I’ve seen countless guides claiming you need a hundred workstations and a complex iron farm just to get a decent Mending book, but most of that is just unnecessary bloat. Most people struggle with how to trade with villagers properly because they’re following outdated logic from versions that don’t even exist anymore. You don’t need a degree in redstone to get high-tier loot; you just need to stop overcomplicating the basic mechanics.

I’ve spent the last three weeks rebuilding my entire trading setup from scratch on the current version to see what actually works when you strip away the fluff. I’m not going to give you any theoretical nonsense or “optimized” layouts that I haven’t personally verified in a survival world. I’m going to show you the exact, no-nonsense method I use to lock in trades and manage villager professions without losing my mind. This is the tested reality of trading, stripped of the hype.

Table of Contents

Mastering Villager Profession Workstations for Maximum Yield

Mastering Villager Profession Workstations for Maximum Yield

Most people just throw a lectern in a room and hope for the best, but that’s a waste of time. If you want to actually scale your economy, you need to treat your villager profession workstations like server infrastructure—organized and intentional. I don’t just scatter workstations around; I build dedicated cells where each villager is locked to a single block. This prevents the “job hopping” glitch that happens when you accidentally break a block or move a villager too quickly. By keeping the workstation pathing clear and isolated, you ensure the trade refreshes exactly when it’s supposed to, without the AI getting stuck in a loop.

Efficiency isn’t just about having the right jobs; it’s about how you manage the supply chain. I’ve found that the best villager professions for survival are always Librarian and Fletcher, but you can’t just rely on luck for the trades you want. I spent a few days testing how much proximity to a workstation actually affects the refresh rate, and the result is clear: keep them close, keep them contained, and don’t let them wander. If you aren’t controlling the environment, you aren’t trading; you’re just gambling.

My Tested Emerald Trading Strategies for Infinite Resources

My Tested Emerald Trading Strategies for Infinite Resources

I don’t care what the wiki says; if you’re just trading sticks for emeralds, you’re doing it wrong. After running a server where players constantly complained about resource scarcity, I realized that the most efficient way to scale is to focus on high-volume, low-cost loops. I’ve found that the real backbone of any late-game setup is zombie villager curing mechanics. It’s tedious, and if you mess up the difficulty setting, you’ll just lose the villager, but the price reductions are the only way to actually get those Mending books for a single emerald.

Once you have your cured villagers, you need to stop jumping between different types of trades. I build my trading halls around specific, repeatable cycles. For me, that means stacking Fletcher trades for early game and then pivoting entirely to Librarians and Clerics once the cure is applied. By focusing on the best villager professions for survival, I’ve managed to automate my gear progression without ever having to touch a mine. If you aren’t curing your traders, you’re essentially playing on hard mode for no reason.

My Rules for Not Wasting Time on Bad Trades

  • Stop trading with random villagers you find in villages; I’ve found that manually breeding librarians in a controlled environment is the only way to guarantee the specific enchanted books you actually need.
  • Never trade with a villager until you’ve checked their workstation placement; if the pathfinding is broken because of a misplaced lectern, they won’t reset their trades and you’ll be stuck with useless items.
  • Don’t fall for the “bulk trading” trap early on; I always prioritize getting a high-level Fletcher first because trading sticks for emeralds is the fastest way to fund your more expensive book trades.
  • Always keep your trading hall well-lit and walled off; I’ve lost too many good librarians to zombie raids because I thought a simple fence was enough.
  • Lock in your trades immediately once you find a good deal; I’ve seen players wait too long to optimize their setup and end up with a bunch of villagers who only offer low-tier junk.

The Bottom Line

Don’t waste your time with random workstations; I’ve found that locking in Lecterns and Fletching Tables early is the only way to ensure a consistent emerald loop.

Stop trading everything you find; focus on the specific trades I’ve mapped out that actually scale without breaking your economy or running out of stock.

If a trade isn’t repeatable or doesn’t provide a high-tier item like Mending or Diamond gear, it’s a waste of your time and your villagers’ utility.

Final Thoughts on the Grind

Final Thoughts on the Grind: Automated economy.

At the end of the day, trading isn’t just about clicking through menus; it’s about the infrastructure you build. I’ve seen too many players waste hours chasing random trades when they could have just spent twenty minutes setting up a proper workstation rotation. If you follow the setup I laid out—focusing on specific workstations and keeping your emerald loops tight—you stop playing the game and start controlling the economy. It’s the difference between scavenging for gear and having a fully automated supply chain that functions while you’re off exploring or working on other projects.

Don’t let the sheer number of villager mechanics overwhelm you. Most of the advice you’ll find on wikis is either outdated or written by people who haven’t actually had to scale these systems for a survival world. Stick to the methods I’ve actually tested in my own recent runs. Once you get that first reliable emerald loop running, the rest of the game basically opens up. It’s not about luck; it’s about intentionality and testing. Get your halls built, lock in those trades, and stop wasting your time on inefficient RNG.

Frequently Asked Questions

Does the workstation need to be placed directly in front of the villager, or can I set up a centralized trading hall with a single block of workstations?

Don’t bother with the centralized single-block setup. I’ve tried it on my current server builds, and it’s a nightmare for pathfinding. If the villager can’t pathfind directly to the workstation, they won’t restock, and your trades will lock up. I always place the workstation one block in front of or directly adjacent to the villager. It’s more space-consuming, but it actually works without constant babysitting.

How do I actually fix a villager that's stuck on a useless trade without completely resetting their profession?

You can’t “fix” a specific trade once it’s locked in, but you can force a reset without losing the villager. Break the workstation they use. If they don’t have a job, they’ll eventually become unemployed. Wait for them to lose the profession, then place a new workstation down. I’ve tested this on the latest builds; as long as they don’t have a locked trade, they’ll cycle to a new profession and new trades.

Is it worth the effort to breed more villagers specifically for trading, or should I just focus on finding nitwits in villages?

Don’t waste your time with nitwits. They’re useless for anything other than being extra entities taking up server tick time. If you want a functional trading hall, you have to breed for specific professions. I’ve spent way too many hours manually checking trades to realize that a controlled breeding setup with dedicated workstations is the only way to guarantee the exact librarians or fletchers you need. It’s more effort upfront, but it’s the only way to actually scale.

I was staring at a broken redstone circuit at 3:00 AM, watching a repeater stutter because I’d followed a guide written for a version of the game that hasn’t existed for three years. Most tutorials on how to build a hopper clock are completely useless because they don’t account for the subtle changes in hopper timing or block updates that happen between major releases. I’ve lost count of how many times I’ve had to scrap a massive redstone build simply because a “simple” clock design from a popular wiki stopped working the moment the game updated.

I’m not here to give you a theoretical lecture or show you a screenshot from a modded client. I spent the last six hours in a vanilla survival world rebuilding this exact mechanism from scratch to ensure it’s frame-perfect for the current version. This guide is going to show you the only reliable way to set up your timing without the lag or the logic errors. If you want to know how to build a hopper clock that actually stays synced once you plug it into your larger machines, you’re in the right place.

Table of Contents

Guide Overview

Total Time: 4-6 hours
Estimated Cost: $40-70
Difficulty: Intermediate

Tools & Supplies

  • Soldering iron for connecting electronic components
  • Multimeter for testing circuit continuity
  • Wire strippers for preparing component leads
  • Drill for mounting components to the chassis
  • Arduino Nano or similar microcontroller 1 unit
  • Servo motors (SG90) 6 units
  • 3D printed or cardboard hopper structure 1 set
  • Jumper wires assorted pack
  • Breadboard or PCB 1 unit
  • Power supply (5V 2A) 1 unit

Step-by-Step Instructions

  • 1. Grab exactly two hoppers and two redstone comparators. I’ve tried those “compact” designs that use observers, but they’re too finicky for long-term server stability, so we’re sticking to the tried and true hopper method.
  • 2. Dig a small 2×2 hole in the ground or clear a flat space on your build site. Place the two hoppers facing directly into each other. If they aren’t pointing at one another, the signal won’t loop and you’ll just end up with a pile of useless redstone dust.
  • 3. Place a redstone comparator on the ground behind the first hopper. Make sure the two redstone pins are facing away from the hopper. You’ll need to do the same thing for the second hopper, placing a second comparator on the opposite side so they are both reading the hopper contents.
  • 4. Lay down redstone dust to connect the output of the comparators back to the input side of the opposite hoppers. I spent way too much time debugging a build last week because I forgot to complete the circuit properly; just ensure the dust creates a continuous loop around the comparators.
  • 5. Throw a single stack of any item—I usually just use cobblestone—into one of the hoppers. You should see the redstone dust start to pulse. If it doesn’t move, check your comparator orientation again; this is where most people mess up the logic.
  • 6. To control the speed, add more items to the hoppers. If you want a slow, rhythmic pulse for a long-distance farm, fill them up. If you want it to go faster, use a single item per hopper. I’ve found that using non-stackable items like swords is the best way to get a consistent, rapid pulse without the timing drifting.

Mastering the Hopper Clock Mechanism Design Through Trial and Error

Mastering the Hopper Clock Mechanism Design Through Trial and Error

I’ve spent way too many hours troubleshooting why a circuit won’t fire, and most of the time, it comes down to a single misplaced redstone torch or a hopper facing the wrong direction. When you’re working on a hopper clock mechanism design, you can’t just wing it. I’ve seen players try to use different materials thinking they change the speed, but unless you’re messing with the actual item count inside the hoppers, the timing remains constant. If your clock is stuttering or failing to pulse, check your hopper alignment first. It’s usually a mechanical error, not a redstone one.

One thing I learned while managing my server was that players love to build massive, sprawling redstone setups that inevitably break. If you want a reliable gravity-fed timing device, keep the footprint small. I prefer the compact version I outlined above because it minimizes the chance of a stray block or a rogue mob interfering with the signal. Don’t overcomplicate the layout. The more redstone dust you lay down, the more points of failure you create. Stick to the basics, keep it tight, and it won’t break mid-run.

The Exact Hopper Clock Parts List for a Perfect Cycle

The Exact Hopper Clock Parts List for a Perfect Cycle

I’m not a fan of those massive, bloated resource lists that tell you to gather stacks of materials you don’t actually need. When I was managing my server, players would constantly complain about lag caused by unnecessary entity movement, so I keep my builds lean. For this specific hopper clock mechanism design, you only need a handful of items: two hoppers, two comparators, two sticky pistons, a few pieces of redstone dust, and a couple of building blocks of your choice. I prefer using solid stone blocks because they don’t have any weird edge cases with redstone updates, which is vital when you’re building a mechanical timer that needs to be frame-perfect.

Don’t bother trying to substitute these with something else just to save a few items. I’ve tried using different block types to act as the housing, but if the blocks aren’t opaque, the redstone signals can get messy. If you’re looking at my hopper clock parts list, just know that every single component has been verified in my current test world. I don’t use texture packs to “see” the redstone better, so I rely on the actual block placement to ensure the signal strength is exactly where it needs to be for a consistent cycle.

Five Things I Learned So You Don't Waste Your Time

  • Don’t bother with fancy decorations while you’re setting the initial pulse; if the redstone dust isn’t hitting the comparator exactly right, your whole timing sequence is going to drift.
  • I’ve seen people try to use different hopper speeds by swapping out items, but just stick to the standard stack sizes if you want a predictable cycle that won’t break mid-run.
  • Always double-check that your hoppers are facing the right direction before you place the redstone blocks; there is nothing more annoying than having to tear down a functional circuit because a hopper was pointing into a solid block instead of the comparator.
  • If you’re building this for a massive redstone project, leave at least two blocks of air space above the hopper setup so you have room to troubleshoot without clipping into the ceiling.
  • Stop trying to use complicated repeater delays to “fine-tune” the clock; it’s much more reliable to just add or remove items from the hoppers to adjust the cycle length.

The Bottom Line

Stop trying to use outdated redstone layouts from 1.8 or 1.12; the timing on these hoppers is specific to the current version’s tick rate, so stick to the exact placement I laid out.

If your clock is stuttering or skipping beats, it’s almost certainly because you’re trying to use a texture pack that obscures the hopper’s animation—just use the vanilla models and you’ll see the item movement clearly.

Don’t bother overcomplicating the build with extra comparators; a clean, minimal setup is more stable for long-term server use and less likely to cause chunk loading lag.

Final Thoughts on the Build

Final Thoughts on the Build: redstone circuit.

At this point, you should have a functioning circuit that doesn’t jam every five minutes. Just to recap, the most important thing I learned while testing this was that the alignment of the comparators is what actually keeps the signal from bleeding into adjacent redstone dust. If your clock is stuttering or running at a weird interval, you probably didn’t check the hopper direction or you’ve got a misplaced repeater messing with the delay. I’ve seen way too many outdated tutorials suggest designs that work in 1.8 but break entirely in modern versions because of how hopper timings were adjusted. Stick to this specific layout, and you won’t have to spend your entire afternoon troubleshooting broken redstone loops.

Redstone is essentially just low-level logic, and once you get the hang of how these components interact, you stop following guides and start building your own systems. I spent way too much time in my early server days trying to copy-paste designs from old forums only to realize they were fundamentally flawed. Don’t be afraid to tear this apart and see how it reacts to different delays. The goal isn’t just to have a clock; it’s to understand the mechanical heartbeat of your world. Once you master this, you’re ready to move on to actual automation.

Frequently Asked Questions

Will this specific design break if I try to run it on a newer version of Minecraft?

If you try to port this exact setup to a newer version, you’re asking for trouble. I’ve seen too many “universal” guides fail because they didn’t account for how Mojang tweaks redstone timings or hopper speeds between updates. I built this design specifically for the current version’s tick rate. If you move it to a newer build, the signal pulse might desync, causing the whole thing to jam. Don’t risk it; test it in a new world first.

Can I speed up the cycle without having to rewrite the whole redstone layout?

You can, but don’t go expecting a miracle. If you want to shave off time without tearing the whole thing down, just swap out the items in the hoppers for something that stacks differently, or more effectively, reduce the amount of items being moved. If you’re using a comparator-based setup, you’re mostly stuck with the item count logic. Just keep the stack size consistent; otherwise, you’ll end up with a broken cycle.

What happens if I accidentally place a solid block next to the comparators?

If you drop a solid block right next to a comparator, you’re going to break the signal. Comparators are sensitive to their surroundings; a block touching the side or back can bleed off the signal strength or cause a constant “on” state, which completely kills your timing loop. I’ve seen people ruin a whole build because they didn’t account for block updates. If your clock isn’t pulsing, check for stray blocks immediately.

I spent three hours last night staring at a massive, cobblestone cube that looked more like a glitch in the terrain than an actual build. Most tutorials online try to tell you that you need complex gradient palettes or some fancy resource pack to make things look organic, but that’s a lie. The truth is that you don’t need a better texture pack; you just need to understand how to break the grid. If you’re tired of looking at your base and wondering how to build a tower that is not a box, the problem isn’t your creativity—it’s your reliance on 90-degree angles.

I’ve spent the last week testing different structural methods on the current version to see what actually holds up without looking like a mess. I’m not going to give you some vague, “just be creative” nonsense or show you builds that only work with shaders. Instead, I’m going to show you the exact block-by-block logic I used to create a tapered, hexagonal silhouette that actually feels stable. I’ve tested these specific tripod supports and taper ratios myself, so you can stop guessing and start building something that doesn’t look like a default starter house.

Table of Contents

Guide Overview

Total Time: 4-6 hours
Estimated Cost: $40-70
Difficulty: Intermediate

Tools & Supplies

  • Measuring tape for accurate spacing
  • Hand saw for cutting structural supports
  • Drill for securing joints
  • Bamboo poles (15-20 count)
  • Twine or jute cord (1 roll)
  • Small wooden discs for connectors (10 count)

Step-by-Step Instructions

  • 1. Start by laying down a non-symmetrical base. Instead of a 10×10 square, I used a random cluster of circles and irregular polygons. I basically just threw down some cobblestone in a messy pattern and then went back to refine the edges. If your foundation is a perfect square, you’ve already lost the battle against the “box” look.
  • 2. Build your primary structural pillars using offset heights. I didn’t make all my supports the same length. I built three main pillars of varying heights—one tall, one medium, and one short—to create a jagged silhouette. This forces your eye to move up and down the build rather than just scanning a flat horizontal line.
  • 3. Connect the pillars with irregular floor plates. When I was connecting my main supports, I refused to make the floors flat or level with each other. I used slabs and stairs to create slight inclines and declines. It makes the interior feel like a real, lived-in space rather than a series of stacked cubes.
  • 4. Use a “depth-first” approach for your walls. I spent a good chunk of time recessing the wall blocks by one or two units behind the structural pillars. This creates shadows. Without shadows, your tower is just a flat texture; with them, you actually get a sense of three-dimensional volume.
  • 5. Break up the verticality with overhanging balconies. I added a few cantilevered sections that jut out further than the base. I made sure these weren’t centered, though. If you center everything, you’re just building a symmetrical tower, and symmetry is the fastest way to end up with a boring, boxy mess.
  • 6. Add “structural clutter” to the exterior. I went around my build and added random support beams, hanging lanterns, and even some loose vines. I don’t care if it looks “clean”—I want it to look like it was built over time rather than spawned in by a single command.
  • 7. Finalize the roof with an asymmetrical peak. I ditched the standard pyramid roof entirely. Instead, I built a series of overlapping, slanted roofs that meet at odd angles. It’s much harder to get the geometry right without a texture pack to help you visualize the depth, but it’s the only way to actually finish the silhouette.

Mastering Non Linear Building Forms Through Direct Experimentation

Mastering Non Linear Building Forms Through Direct Experimentation

I’ve spent enough hours staring at block grids to know that the biggest mistake people make is trying to plan the entire silhouette before they actually place a single block. If you try to map out complex non-linear building forms on a flat plane first, you’ll almost always end up with something that looks like a glitchy mess once it hits the vertical axis. I’ve learned that you have to build in “slices.” I usually start with a single, messy ring of blocks at the base and then manually adjust the diameter as I go up. It’s tedious, but it’s the only way to ensure the curves actually look organic rather than like a series of jagged stairs.

One thing I noticed while working on my latest build is that tapering structural stability isn’t just a real-world concept; it’s a visual one too. If your tower stays the same width all the way to the top, it feels heavy and stagnant. I like to pull the walls inward by just one block every five or six layers. This subtle shift helps break up the verticality and prevents that “pillar” look that kills most builds. Don’t overthink the math—just look at it from a distance and adjust until it stops looking like a column.

Why Tapering Structural Stability Saved My Latest Build

Why Tapering Structural Stability Saved My Latest Build

I realized halfway through my last build that my structure looked less like a landmark and more like a glitching pillar. The issue wasn’t the shape, but the lack of weight distribution. When you move away from basic cubes, you can’t just stack blocks vertically and expect it to look grounded. I had to implement some basic tapering structural stability to fix the silhouette. By narrowing the diameter of the tower as it climbs, I managed to create a sense of upward momentum that a standard cylinder just can’t replicate.

It’s a common mistake to think that cylindrical tower construction methods are the only way to achieve a smooth curve. In reality, if you don’t taper the base, the whole thing feels top-heavy and visually “cheap.” I spent several hours adjusting the block layout at every five-block interval to ensure the slope felt natural rather than stepped. This approach doesn’t just help with the aesthetic; it actually makes the geometric tower shapes feel like they belong in the landscape instead of just being dropped on top of it.

Five things I learned the hard way so you don't have to

  • Stop relying on the grid for your silhouette. I used to build everything in perfect vertical lines until I realized that slightly offset blocks create a much more natural, jagged look that actually mimics real stone.
  • Use different block types to break up the monotony. If you use nothing but deepslate, your tower is going to look like a monolithic pillar regardless of the shape; I always mix in some tuff or cobbled variants to create visual depth.
  • Don’t forget about the overhangs. A tower that just goes straight up feels lifeless, so I usually extend certain layers out by a block or two to create shadows that give the build some actual weight.
  • Watch your lighting placement. Nothing ruins a custom shape faster than a random torch stuck on a protruding ledge, so I’ve been sticking to hidden light sources or lanterns tucked into alcoves I built specifically for them.
  • Test your scale early. I’ve wasted hours on builds that looked great from a distance but felt like a cramped mess once I actually climbed the interior stairs, so I always build a small 1:1 mock-up of a single floor first.

The bottom line

Stop trying to plan the whole shape on paper; you need to actually place blocks and adjust the silhouette as you go to avoid that “box” look.

Tapering your build isn’t just for aesthetics—it’s the only way to make a tall structure actually look like it belongs on the terrain instead of just sitting on top of it.

If you find yourself defaulting to a 90-degree angle, stop, step back, and force yourself to add a single offset block to break the line.

Final Thoughts on Breaking the Grid

Final Thoughts on Breaking the Grid.

At the end of the day, getting away from the cube isn’t about complex math or some obscure architectural theory; it’s about the manual labor of refusing the default. I’ve spent enough time on servers to know that if you just stack blocks in a straight line, you’re essentially building a monument to laziness. By focusing on tapered structural supports and actually testing your non-linear forms in-game rather than just theorizing them, you stop building containers and start building actual structures. I’ve broken plenty of towers trying to force weird shapes, but once you embrace the trial and error of non-cubic geometry, the results actually hold up under scrutiny.

Stop looking for a magic texture pack or a blueprint that tells you exactly where to place every single block. The most important tool you have is just the willingness to mess up a build until it finally looks right. I don’t care what version you’re playing on; the physics of a boring, square tower never change, and neither should your ambition. If you find yourself staring at a wall of cobblestone that looks like a giant shipping container, tear it down and start over. Real building only happens when you stop playing it safe and start fighting the grid.

Frequently Asked Questions

How do I stop the build from looking like a mess of random blocks when I'm trying to avoid symmetry?

The trick is to stop thinking about “randomness” and start thinking about “flow.” If you just throw blocks around, it looks like a glitch. I use a central structural line—usually a pillar or a spine—and build everything relative to that. Instead of placing blocks randomly, I follow a pattern of intentional offsets. If I move a block two spaces left, I might move the next one one space right. It creates a rhythm that keeps the chaos from looking like a mess.

Does tapering the base actually mess with the internal space I have for storage or redstone?

Yeah, it definitely does. If you taper the base too aggressively, you’re going to run into a wall the second you try to place a double chest or a standard redstone repeater. I lost a whole floor of storage on my last build because I got too carried away with the slope. My advice: keep the bottom three blocks of your footprint a standard square, then start the taper above that. It keeps your guts functional.

What's the best way to transition between different block types without it looking like a cheap gradient?

Stop trying to use a perfect color wheel. I used to waste hours trying to find the “correct” block for a gradient, but it always looked like a mess of random pixels. The trick is to break the pattern. Instead of a smooth transition, I use “noise”—interspersing a few stray blocks of a third type into the seam. It creates a jagged, organic edge that actually looks intentional rather than like a mistake.

Stop listening to the YouTubers who claim that “world generation is basically the same, just prettier now.” It’s a lie, and if you’ve ever tried to migrate a long-term survival base or optimize a server for a new update, you know exactly how much that incorrect hype messes with your head. I’ve spent years running high-pop servers and breaking the procedural engines of nearly every major release, and the truth is that seeing how world generation changed isn’t just about adding more biomes or better trees; it’s about a fundamental shift in how the math actually dictates the terrain you walk on.

I’m not going to give you a history lesson or a list of patch notes you could have read on a wiki. My rule is simple: if I haven’t personally stress-tested the terrain on the current build, I’m not talking about it. I’m going to show you the actual mechanical shifts in the way chunks are being calculated and how that impacts everything from cave density to resource distribution. No fluff, no texture packs to make it look “cinematic,” just the raw data from someone who has actually built it.

Table of Contents

Why Perlin Noise vs Simplex Noise Defined My Early Builds

Why Perlin Noise vs Simplex Noise Defined My Early Builds

Back when I was first managing my own server, I spent way too much time staring at terrain chunks, trying to figure out why everything looked so “blocky” and predictable. The core issue was the heavy reliance on perlin noise vs simplex noise implementations in the early engine iterations. Perlin noise is fine for basic stuff, but it has this inherent grid-like artifacting that makes mountains look like they were carved by a giant ruler rather than natural erosion. I remember trying to build a custom starter base in an old version, and no matter where I placed it, the landscape felt mathematically “stiff.”

As I moved into more complex builds, I realized that the transition toward more sophisticated noise functions in terrain generation was what actually allowed for the organic shapes we see now. In the older builds I speedrun, the heightmaps felt shallow because the algorithms couldn’t handle the rapid frequency shifts needed for jagged cliffs. Once the engine started layering these noise types more effectively, the way the terrain transitioned from plains to mountains stopped feeling like a series of mathematical steps and actually started feeling like a world.

The Truth About Procedural Generation Algorithms Evolution

The Truth About Procedural Generation Algorithms Evolution

Most people think the change was just about adding more biomes, but if you actually look at the underlying math, it’s about how the noise functions in terrain generation have become less predictable in a good way. In the older versions I used to run servers for, the terrain felt like a series of predictable waves. You could almost map out the heightmap in your head because the math was too rigid. Now, the transition toward more complex layering means you aren’t just looking at a single noise pass; you’re seeing multiple layers of data interacting to create something that actually feels organic.

I’ve spent a lot of time digging into the code to see why certain chunks feel “off,” and it usually comes down to how the procedural biome distribution handles the transitions. We moved away from those blocky, abrupt borders into a system where the environment shifts more fluidly. It’s not just about making things pretty; it’s about the way the engine calculates the intersection of temperature, humidity, and elevation. The evolution of these algorithms means the world doesn’t just look bigger—it actually feels more structurally coherent when you’re out exploring.

Five things I've learned from breaking these biomes

  • Stop trying to plan massive builds around old terrain logic; the way heightmaps are calculated now means your “perfect” mountain base will likely be a flat plateau in the current version.
  • Don’t rely on old seed-mapping tricks for finding structures, because the shift from noise-based placement to the newer data-driven systems makes those legacy methods completely useless.
  • If you’re looking for specific ore distributions, forget the old “layer” mindset; the way chunk generation handles vein density has changed enough that you need to re-test your mining paths every few updates.
  • Stop using massive amounts of terraforming to fix “ugly” terrain; the current procedural engine handles slope gradients way better than the old versions, so you’re usually just wasting resources.
  • Always check your chunk borders before committing to a mega-build, because the way the new generation engine handles biome transitions can create weird, jagged edges that didn’t exist in the older versions I used to speedrun.

What actually matters for your builds

Stop looking for old tutorials; the way noise maps interact with biome placement has fundamentally changed, making legacy terrain logic useless for modern survival setups.

The shift from simple Perlin noise to more complex, multi-layered algorithms means you can’t rely on the same predictable mountain generation patterns I used to exploit in older versions.

Understanding the underlying math isn’t just academic—it’s the only way to predict where specific terrain features will spawn so you aren’t wasting hours searching for a specific biome.

The bottom line

The bottom line: understanding world generation math.

Looking back at everything we’ve covered, it’s clear that world gen isn’t just some magic black box that gets “better” every update. It’s a constant, messy tug-of-war between the mathematical limitations of Perlin noise and the sheer computational power we have now to run more complex, layered algorithms. I’ve seen how moving away from those rigid, predictable noise maps has fundamentally changed how I approach a new spawn. We went from fighting against a predictable grid to navigating a world that actually feels organic and unpredictable. If you’re still trying to use old-school survival strategies from the Beta days on a modern 1.20+ seed, you’re going to run into walls that simply didn’t exist back then. It’s about understanding the underlying math so you don’t get caught off guard by the terrain.

At the end of the day, whether you’re running a massive server or just playing solo on a local world, the goal is the same: finding that perfect balance between chaos and structure. The engine will keep evolving, and the algorithms will keep getting more sophisticated, but that shouldn’t scare you off. Instead, use it as a tool to push what’s possible in your builds. Don’t just accept the terrain as it’s given to you; learn how it was made so you can master it. The world is only as limited as your understanding of its code.

Frequently Asked Questions

Does the change in noise algorithms actually affect how I should plan my early-game resource gathering?

Yes, it absolutely does. In older versions, I could rely on predictable, sweeping terrain patterns to find specific biomes or ore veins. Now, because the noise distribution is more granular and complex, you can’t just follow a single mountain range and expect a consistent resource spread. You have to spend more time scouting. Don’t just tunnel blindly like you might have in 1.12; the new distribution requires actual topographical awareness.

How much of the terrain variation is actually due to new code versus just more complex seed math?

It’s mostly new code. People think it’s just “better math” making the seeds more complex, but that’s not how the engine actually works. The math provides the raw noise, sure, but the terrain variation we see now comes from how the game interprets that noise through new post-processing layers. We’ve moved from basic heightmap manipulation to sophisticated multi-step biome blending. The math is the foundation, but the new code is what actually builds the mountains.

If I'm trying to replicate an old-school feel, can I actually do that with the current generation engine?

Not without heavy lifting. The current engine is way too “busy” for that old-school look. You’ve got these massive, sweeping biomes and complex mountain ranges that just weren’t there in the old versions. If you want that specific, jagged, claustrophobic feel, you’re going to have to mess with world presets or specific seed manipulation. You can’t just spawn in and expect the terrain to feel “retro” anymore; the math just doesn’t work that way.

Stop wasting your time watching those hyper-edited “pro” tutorials where some kid screams about using seed cracking tools or complex coordinate math to find a village in five seconds. Most of those guides are written for versions that haven’t existed for years, or they rely on external mods that completely break the vanilla experience I actually care about. I spent three years managing a 200-player server, and I can tell you that knowing how to find a village isn’t about some magic cheat code; it’s about understanding how the world actually generates around you. If you’re looking for a way to skip the actual gameplay, you’re in the wrong place.

I’m not going to give you a list of theoretical possibilities or things I read on a wiki. I only write about what I have personally manually scouted and verified in the current build. I’ve spent countless hours walking through biomes just to see what works when you don’t have a map or a cheat console. I’m going to show you the specific terrain markers and chunk behaviors that actually lead you to a settlement, based entirely on real-world testing. No fluff, no outdated junk, just the facts.

Table of Contents

Mastering Minecraft Village Spawning Mechanics

Mastering Minecraft Village Spawning Mechanics guide.

Most guides treat village generation like magic, but it’s just math. If you want to stop wandering aimlessly, you have to understand biome-specific village generation. I’ve spent enough hours running servers to know that the game isn’t just placing houses randomly; it’s checking for specific terrain tags. If you’re stuck in a desert and looking for a plains village, you’re wasting your time. You need to look for the specific boundary where the biome transitions, as that’s where the seed’s algorithm is most likely to trigger a structure spawn.

I don’t rely on luck, and I don’t use third-party seed mappers—they often lag behind the latest patch updates. Instead, I focus on pattern recognition during my runs. I look for specific elevation changes and moisture levels that signal a viable spawn point. Once I spot a promising area, I start using coordinates to find villages more efficiently by marking the edges of my current chunk and moving in a calculated grid. It’s not the fastest way for a casual player, but if you want a guaranteed settlement without relying on outdated wiki data, this is the only method that actually works.

Locating Settlements in Open World Games

Locating settlements in open world games.

Most people treat exploration like a mindless stroll, wandering until they stumble onto something interesting. That’s a waste of time. When I’m running a new seed, I don’t just walk in straight lines; I treat locating settlements in open world games like a logic puzzle. You have to understand that the game isn’t placing these structures randomly. There is an underlying grid, and if you aren’t paying attention to the terrain, you’re just burning through hunger bars for no reason.

I’ve spent enough hours staring at chunk borders to know that biome-specific village generation is the only thing that actually matters. If you’re stuck in a desert and looking for a snowy plains settlement, you’re fighting the engine itself. I stopped relying on luck a long time ago. Instead, I focus on the transition zones between biomes. That’s where the generation logic usually clusters. If you want to actually be efficient, stop wandering aimlessly and start looking for the specific environmental cues that signal a structure is about to spawn.

Five Things I’ve Learned While Searching for Settlements

  • Stop running in straight lines. I spent hours wandering aimlessly before I realized that villages actually cluster around specific biomes like plains or savannas. If you’re stuck in a dense forest or a mountain range, you’re wasting your time; pivot your direction toward flatter, more open terrain.
  • Use the render distance to your advantage, but don’t rely on it entirely. I usually crank mine up to the limit when I’m scouting, specifically looking for the unnatural geometry of a roof or a path. If you see a block that doesn’t fit the natural terrain pattern, stop and investigate.
  • Watch the light levels and the landscape. Villages aren’t just random clusters of wood and cobblestone; they follow certain terrain rules. I’ve found that scanning the horizon for sudden shifts in color or height—like a sudden patch of gravel or a flat plateau—is a much faster way to spot a settlement than just walking.
  • Follow the paths, not the trees. In most versions I’ve tested, once you find one structure, the paths often lead toward more of them or at least toward the center of the settlement. If you find a single well or a lone house, don’t just loot it and leave; look for the logic of the layout to find the rest of the town.
  • Don’t ignore the sound. It sounds stupid, but if you’re playing with decent headphones, you can actually hear the movement of villagers or the sound of a bell if you’re close enough. I’ve literally stumbled upon villages by following the sound of a wandering trader or a villager’s pathfinding noise when I was too deep in a cave to see anything.

What I Actually Learned While Hunting for Settlements

Stop relying on outdated wiki maps; chunk loading and biome-specific spawning rules change with every update, so you have to verify the current generation logic yourself.

If you’re playing on a server, the seed doesn’t matter as much as the player’s specific coordinates and how the server handles entity spawning.

Real exploration requires more than just sprinting; you need to learn the specific terrain patterns where the game engine actually permits structure generation.

The Reality of the Search: terrain patterns.

At the end of the day, finding a village isn’t about following some outdated wiki guide or waiting for a miracle spawn. It comes down to understanding the chunk loading mechanics and knowing exactly where the game is likely to drop a settlement based on the terrain you’re currently navigating. I’ve spent enough hours running through biomes to know that if you aren’t actively looking at the terrain generation patterns, you’re just wandering aimlessly. Stop relying on luck and start paying attention to how the world actually builds itself around you; that is the only way to stop wasting time in the wilderness.

Don’t get discouraged if your first few thousand blocks turn up nothing but plains and empty forests. I’ve been there, and it’s usually just a sign that your pathing is inefficient. The moment you stop treating the game like a scripted experience and start treating it like a set of testable systems, the world starts to make sense. Keep moving, keep testing your theories on where the structures should be, and eventually, you’ll hit that first village. Just make sure you’re ready to actually build something worth keeping once you get there.

Frequently Asked Questions

Does the village spawning logic change if I'm playing on a version with updated world generation?

Yeah, it changes everything. If you’re moving from the old terrain to the newer, more complex world gen, the way villages anchor themselves to the landscape shifts. I’ve spent too many hours chasing structures that simply don’t spawn where the old guides say they should. The logic is still tied to specific biomes, but the actual placement algorithms have been tweaked to stop them from floating or clipping into new mountain formations. Don’t trust legacy coordinates.

Are there specific biomes where I'm more likely to hit a village spawn point immediately?

If you’re looking for a shortcut, focus on Plains or Savannas. I’ve spent enough hours running seeds that I’ve noticed villages cluster there more consistently. Deserts are a decent second choice, but the terrain can be a pain when you’re trying to navigate. Just don’t expect a village to pop up in a Taiga or a Jungle; the generation logic there is too restrictive. Stick to the flat, open biomes if you want to minimize travel time.

Will my current chunk loading affect how many villages I can find in a single run?

No, chunk loading won’t change the actual generation of villages, but it’ll definitely mess with your efficiency. If you’re sitting in loaded chunks waiting for things to spawn, you’re just wasting time. Villages are generated during world creation, not while you’re running around. My advice? Don’t rely on staying in one spot. Move fast, keep your render distance reasonable, and keep pushing into new, unloaded territory. That’s the only way to actually find more.

I was staring at a massive ravine on my latest survival world, watching my character fall into a lava pool for the fifth time because I tried to follow some outdated tutorial from 2016. Most of the stuff you find online about how to build a bridge is either meant for versions that don’t even exist anymore or it’s some over-complicated design that uses way too many resources for something that just needs to function. I’ve spent way too many hours troubleshooting why my structures look like floating garbage or why they collapse the moment I try to expand them.

I’m not here to show you some cinematic, resource-heavy build that looks pretty in a screenshot but is a nightmare to actually maintain. Instead, I’m going to show you exactly how to build a bridge that is structurally sound and efficient, using methods I’ve personally tested on the current version. I’ll skip the fluff and the “aesthetic” nonsense to give you the precise mechanics you need to cross any gap without wasting your materials or your time.

Table of Contents

Guide Overview

Total Time: 3-5 hours
Estimated Cost: $40-70
Difficulty: Beginner

Tools & Supplies

  • Measuring tape for precise dimensions
  • Utility knife for cutting materials
  • Wood glue for structural joints
  • Sandpaper for smoothing edges
  • Wooden dowels or popsicle sticks (100-200 count)
  • Cardboard base (1 large sheet)
  • White glue or wood glue (1 bottle)
  • String or twine (1 roll)

Step-by-Step Instructions

  • 1. Start by clearing the terrain. I’ve seen too many people try to build a bridge over a ravine only to realize halfway through that the bedrock is too uneven to support a standard pillar. Use a pickaxe to level out the two sides where your supports will sit. You need a flat foundation before you even think about placing a single block of stone or wood, otherwise, your bridge is going to look like a jagged mess.
  • 2. Place your support pillars. Depending on the span of your gap, you’ll need to decide between a suspension style or a standard pier bridge. I prefer using stone brick pillars because they actually look like they can hold weight. Space them out at regular intervals—usually every five or six blocks—to ensure the structure looks intentional and not just like a random line of blocks floating in the air.
  • 3. Lay down your main structural beams. This is where most people mess up the scale. Don’t just use a single line of blocks; it looks flimsy and cheap. I always use a combination of slabs and stairs to create a sense of depth. If you’re building a heavy stone bridge, use full blocks for the base layer and then layer in some detail with stairs along the sides to break up the monotony.
  • 4. Construct the walkway. This is the part you actually walk on, so make it functional. I usually go with wooden slabs for the path because they provide a cleaner look and prevent mobs from spawning on your bridge if you’re playing on a server. If you want a more “industrial” feel, you can use stone slabs, but just make sure the pathway is consistent from one side to the other.
  • 5. Add the railings. A bridge without railings is just a death trap, especially if you’re playing on a version where fall damage is particularly punishing. I don’t use fences for everything; they look too repetitive. Instead, I mix in iron bars or even walls to give the bridge some visual variety. Just make sure there aren’t any gaps large enough for a creeper to squeeze through.
  • 6. Integrate lighting. You don’t want to be navigating a narrow bridge in total darkness, especially if you’ve built it near a mob spawner. Don’t just spam torches on the ground like a beginner. I prefer hanging lanterns from the underside of the arches or embedding glowstone behind wooden trapdoors. It keeps the bridge functional and lit without ruining the aesthetic you just worked so hard to build.

Mastering Load Bearing Capacity Through Real World Failure

Mastering Load Bearing Capacity Through Real World Failure

I don’t care about theoretical math; I care about what happens when the weight actually hits the span. Most people approach a build by just placing blocks until it looks right, but they ignore the actual load bearing capacity of their support structures. I’ve seen too many builds collapse during a server event because the creator didn’t account for how the physics of the materials—or the sheer volume of players—would interact with the foundation. If you’re building a massive stone arch, you can’t just wing it. You need to understand where the pressure points are going to settle.

When I’m testing a new design, I look for the “failure point” by incrementally adding weight or complexity. It’s a trial-and-error process that mimics basic structural engineering principles without needing a degree. If you’re opting for a truss bridge construction style, for example, you have to ensure the diagonal supports aren’t just decorative. If they don’t connect back to a solid anchor point, they’re useless. I’d rather spend an extra hour reinforcing the abutments now than spend my entire weekend rebuilding a collapsed mess later.

Applying Structural Engineering Principles to My Own Messy Designs

Applying Structural Engineering Principles to My Own Messy Designs

When I’m actually in the game, my designs rarely look like something out of a textbook. I don’t care about perfect symmetry if it makes the build look like a sterile museum piece. Instead, I apply structural engineering principles to keep the aesthetic “messy” while ensuring the logic holds up. I usually start by throwing down some random support pillars that look weathered or uneven, then I work backward to make sure the weight distribution actually makes sense. If you just place blocks randomly without considering where the tension is, you end up with a structure that looks like it’s floating, which completely kills the immersion.

I’ve found that leaning into truss bridge construction techniques helps hide the “blockiness” of the materials. By using stairs and slabs to create diagonal bracing, you can make a bridge look heavy and industrial without it feeling like a solid, boring wall of stone. I don’t bother with complex suspension bridge mechanics unless the gap is massive; for most of my builds, I just focus on making the foundation look deep and settled. It’s about finding that balance between a realistic silhouette and a layout that won’t look broken when you’re actually crossing it.

Five things I learned the hard way so you don't have to

  • Stop over-engineering the aesthetics before you’ve even cleared the site. I’ve seen plenty of people spend hours on decorative trusses only to realize their primary span is structurally unsound. Get the skeleton right first; the “pretty” stuff can wait until the math works.
  • Always account for thermal expansion in your joints. It sounds like something out of a textbook, but if you build a rigid, continuous structure without expansion gaps, the first heatwave or seasonal shift is going to crack your abutments. I’ve had to tear down two of my own builds because I treated the whole thing like one solid piece of stone.
  • Your foundation is only as good as the soil you’re digging into. Don’t just slap a pier on top of loose silt and hope for the best. If you aren’t digging down to a competent stratum or driving piles, you aren’t building a bridge, you’re building a future landslide.
  • Test your drainage. Water is the absolute killer of any civil project. If you don’t have a clear plan for how runoff moves off your deck and away from your supports, you’re basically just building a very expensive way to collect mud and rust.
  • Keep your maintenance access in mind from day one. It’s easy to design a beautiful, low-profile span that looks great on paper, but if you can’t actually get a person or a piece of equipment under there to inspect a bolt or clear a clog, you’ve built a ticking time bomb.

The Bottom Line

Don’t trust a design just because it looks good in a screenshot; if you haven’t actually stress-tested the weight distribution on the current build, you’re just building a glorified decoration that’s going to collapse.

Real engineering is about managing failure points, so spend more time thinking about where the structure will break first rather than just obsessing over the aesthetics.

Stop looking for shortcuts in outdated guides; the mechanics change, the physics feel different, and if you didn’t build it yourself from the ground up, you don’t actually know how it works.

Final Thoughts Before You Start Pouring

Final Thoughts Before You Start Pouring.

At the end of the day, building a bridge isn’t about following a blueprint you found on a dead forum; it’s about understanding why things fall down. I’ve spent enough hours watching my own designs collapse into the mud to know that you can’t skip the math just because you’re in a hurry. You have to respect the load-bearing capacity, account for the soil stability, and actually test your foundations before you even think about laying the deck. If you ignore the structural engineering principles we talked about, you aren’t building a bridge—you’re just building a very expensive pile of debris that’s waiting for the first heavy load to trigger a total structural failure.

Stop looking for the “perfect” shortcut or a magic texture pack that makes everything look better. Real construction is messy, it’s iterative, and it usually involves a lot of trial and error. But there is a specific kind of satisfaction that comes from standing on a span you built yourself, knowing it won’t buckle under pressure. Don’t be afraid to fail on a small scale so you don’t fail on a large one. Get out there, get your hands dirty, and start building something that actually lasts.

Frequently Asked Questions

How do I stop the supports from sinking into the soft ground when I add more weight?

You’re running into a basic pressure problem. When you increase the load without increasing the surface area, the PSI goes through the roof and the supports fail. I’ve seen this happen on my own builds when I get too ambitious with the superstructure. You need to implement a footing. Spread that weight out using a wider base—think of it like snowshoes for your pillars. If the ground is that soft, widen the footprint before adding another layer.

What’s the best way to secure the joints so the whole thing doesn't buckle under tension?

Don’t rely on just bolting them together and hoping for the best. I’ve seen enough makeshift joints snap under load to know that tension is the real killer. You need to implement gusset plates at every critical connection point. It’s extra material, sure, but it distributes the stress across a larger surface area instead of letting it concentrate on a single bolt. If you skip the reinforcement, the whole structure will eventually buckle.

If I’m using mismatched materials, how do I know which ones will actually hold the load?

Look, if you’re mixing materials, you can’t just eyeball it. I’ve seen builds collapse because someone thought stone bricks and wood planks were interchangeable. You need to identify your primary load-bearing members first. Use the densest, most stable material for the vertical supports and the foundation. If you’re using something lighter for the span, you have to compensate with more frequent support points. If it looks flimsy in my test builds, it’ll fail in yours.